
Introduction
Brake Inspection Checklist | A brake problem doesn’t always announce itself with a loud grinding noise or a warning light. Sometimes the first sign is much smaller: the brake pedal feels slightly different, the car takes a little longer to slow down, the steering wheel vibrates, or the vehicle pulls gently to one side when braking.
These small changes are exactly why having a practical brake inspection checklist matters.
Regular brake inspection helps you notice changes in the braking system before they become more serious. It also helps you understand when a simple visual check is enough and when the vehicle needs a professional inspection.
If you’re looking for broader vehicle maintenance information, you can also explore FuelDeliveryDubai for practical vehicle and roadside guidance in Dubai.
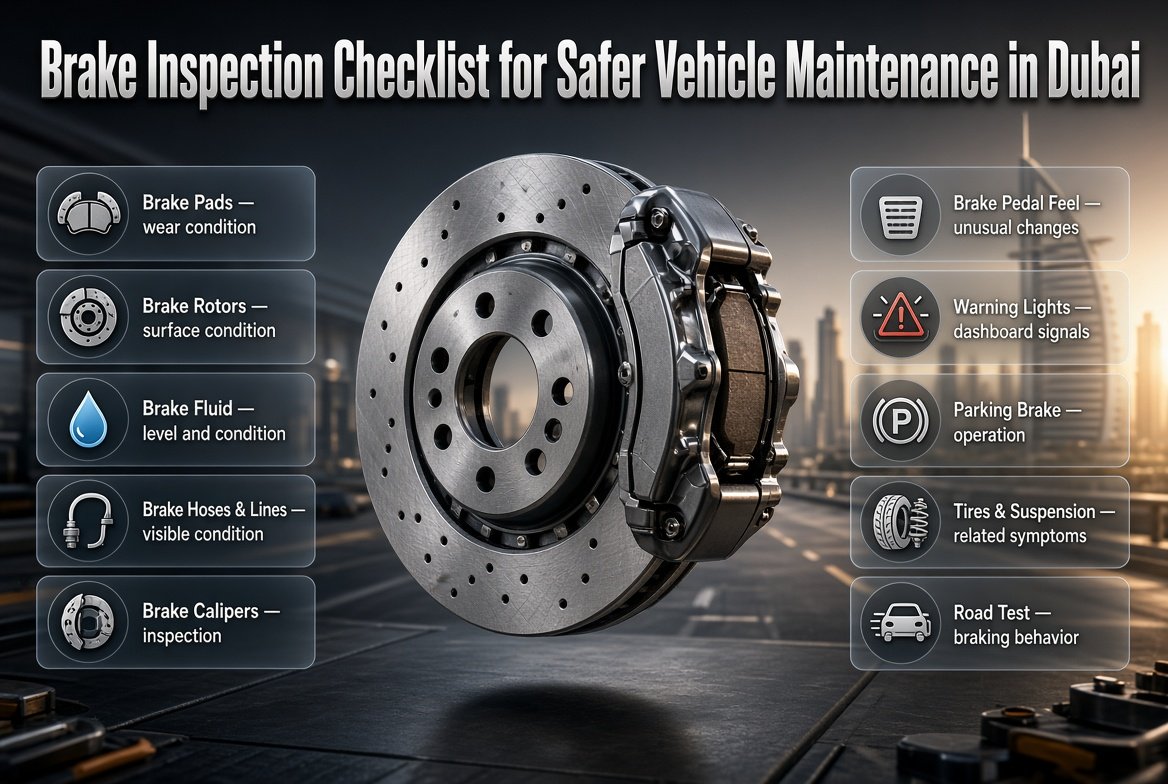
This guide covers the main parts of a brake inspection, including brake pads, rotors, brake fluid, hoses, calipers, brake pedal feel, warning lights, parking brakes, tires, suspension-related symptoms, and road-test observations. It also explains what drivers can safely check themselves and what should be left to a qualified technician.
For Dubai drivers, this is particularly useful because daily driving can involve heavy traffic, repeated braking, long highway journeys, and frequent stop-and-go conditions. The goal isn’t to assume that every vehicle needs brake replacement. The goal is to inspect, understand, measure where necessary, maintain, and monitor.
What Is a Brake Inspection Checklist?
A brake inspection checklist is a structured list of items used to check the condition and performance of a vehicle’s braking system. It can include warning lights, brake pedal feel, fluid level, visible leaks, brake pads, rotors, hoses, calipers, parking-brake operation, unusual noises, vibration, pulling, and tire condition.
A proper inspection isn’t simply about asking, “Are my brake pads worn?”
The braking system contains several components that work together. A problem in one area can sometimes create symptoms that appear to come from another.
A useful brake inspection therefore considers:
- Brake warning lights
- ABS warning lights
- Brake pedal feel
- Pedal travel
- Brake fluid level
- Brake fluid leakage
- Brake pads
- Brake rotors or discs
- Brake calipers
- Brake hoses
- Hydraulic lines
- Parking brake
- Brake-related noises
- Vibration or pulsation
- Vehicle pulling
- Tire pressure and condition
- Suspension-related symptoms
NHTSA materials on brake-system inspection also demonstrate the importance of checking components such as brake linings, hydraulic components, hoses, master cylinders, and other parts of the braking system rather than relying on one visual check alone.
Why Is a Regular Brake Inspection Important?
Brakes are a safety-critical vehicle system. They need to provide predictable braking whenever the driver needs to slow or stop the vehicle.
A brake inspection can help identify developing problems such as:
- Excessive brake-pad wear
- Uneven pad wear
- Damaged rotors
- Brake-fluid leakage
- Damaged brake hoses
- Caliper problems
- Parking-brake issues
- ABS warnings
- Soft or unusual pedal feel
- Brake vibration
- Pulling during braking
- Abnormal brake noise
The important point is that inspection doesn’t automatically mean replacement.
A technician may inspect your brake pads and find that they still have sufficient usable material. In that situation, replacing them simply because the vehicle was inspected may not be necessary.
NHTSA-related inspection guidance emphasizes examining brake components and using appropriate specifications rather than relying on assumptions.
For everyday drivers, the practical approach is simple:
Check the condition before deciding what needs to be replaced.
Complete Brake Inspection Checklist
The following checklist gives you a practical overview of the major areas that should be considered during brake inspection.
| Brake Inspection Item | What to Check | Possible Warning Sign |
|---|---|---|
| Brake warning light | Dashboard warning | Light stays on |
| ABS warning light | ABS system warning | Light remains illuminated |
| Brake pedal | Firmness and consistency | Soft or sinking pedal |
| Pedal travel | Normal movement | Excessive travel |
| Brake fluid | Correct level | Low or contaminated fluid |
| Fluid leakage | Visible hydraulic leaks | Wet components |
| Brake pads | Friction material | Excessive or uneven wear |
| Rotors | Surface and condition | Deep scoring or damage |
| Calipers | Visible condition | Leakage or uneven wear |
| Hoses | Physical condition | Cracks, swelling or damage |
| Brake lines | Leakage/corrosion | Fluid leakage |
| Parking brake | Holding and release | Weak or abnormal operation |
| Noise | New sounds | Grinding or scraping |
| Vibration | Smooth braking | Pedal or steering vibration |
| Vehicle direction | Straight braking | Pulling to one side |
| Tires | Pressure and condition | Uneven wear or low pressure |
This checklist is a starting point. Detailed measurements and component inspections should follow the manufacturer’s specifications for the particular vehicle.
1. Check the Brake Warning Light
The dashboard is the first place to start.
When you start the vehicle, pay attention to the brake-related warning lights. Some warning lights illuminate temporarily as part of the normal startup check and then switch off.
A warning light that stays illuminated or appears unexpectedly should not be ignored.
Check for:
- Brake warning light
- ABS warning light
- Electronic parking-brake warning
- Brake-system messages
- Manufacturer-specific brake warnings
A warning light doesn’t necessarily tell you which component has failed. It tells you that the vehicle’s monitoring system has detected something that may need attention.
Pro Tip: If a brake or ABS warning light remains on, check the owner’s manual for the meaning and arrange appropriate diagnosis rather than assuming the car is safe simply because the brakes still feel normal.
2. Check Brake Pedal Feel
Brake pedal feel is one of the easiest things a driver can monitor because you experience it every time you drive.
A normal pedal should feel consistent with the vehicle’s usual behavior.
Be alert if the pedal suddenly becomes:
- Soft
- Spongy
- Lower than usual
- Excessively long in travel
- Unusually hard
- Inconsistent
- Slow to return to its normal position
A change in pedal feel doesn’t provide a complete diagnosis by itself.
For example, a soft pedal can have different possible causes depending on the vehicle and braking system. Hydraulic issues, air in the system, component problems, or other faults may produce similar sensations.
Professional advice
Don’t try to compensate for an abnormal pedal by changing your driving style.
If the pedal behavior has changed significantly, have the vehicle inspected.
3. Inspect the Brake Fluid Level

Brake fluid plays an essential role in hydraulic braking systems.
The brake-fluid reservoir should be checked according to the manufacturer’s instructions. Many reservoirs have minimum and maximum markings, but the correct checking procedure can vary by vehicle.
Look for:
- Correct fluid level
- Unusual fluid loss
- Damaged reservoir
- Damaged cap
- Visible contamination
- Signs of leakage
A low brake-fluid level deserves attention.
It shouldn’t automatically be treated as a simple “fill it up” situation because the reason for the low level matters.
Potential causes can include brake-pad wear, leakage, or another braking-system issue.
Common Mistake: Adding brake fluid without investigating why the level is low can hide an underlying problem.
4. Look for Brake Fluid Leaks
Brake fluid leakage can compromise braking-system performance.
During a basic inspection, look for obvious wetness around visible brake components and areas where hydraulic lines or hoses connect.
Possible signs include:
- Wet areas near brake components
- Fluid around a caliper
- Fluid around hose connections
- Unexplained brake-fluid loss
- Warning lights combined with low fluid
NHTSA test documentation specifically includes inspection of components such as the master cylinder, wheel cylinders, brake hoses, and other areas for fluid leakage.
If you suspect a brake-fluid leak, don’t treat it like an ordinary fluid leak from another vehicle system.
Braking performance can be affected by hydraulic problems.
5. Inspect Brake Pads
Brake pads are friction components that gradually wear during normal braking.
The rate of wear isn’t identical for every vehicle.
It can depend on:
- Driving conditions
- Traffic
- Vehicle weight
- Brake-system design
- Driving habits
- Road conditions
- Pad material
- Front/rear brake distribution
Some vehicles allow the pad to be viewed through an opening in the wheel or caliper. Others require more detailed inspection.
Look for:
- Remaining friction material
- Uneven wear
- Cracks or damage
- Contamination
- Wear indicators, where fitted
Do not rely on one universal minimum thickness number for every vehicle. Manufacturer specifications and the vehicle’s brake-system design should guide service decisions.
NHTSA-related brake inspection documentation also distinguishes between visual inspection and more detailed component inspection, reinforcing why a quick look doesn’t always provide the complete picture.
6. Check for Uneven Brake-Pad Wear
Uneven wear is an important clue.
Imagine the outer pad looks reasonably healthy but the inner pad is much thinner.
That doesn’t necessarily mean the solution is simply to replace the pads.
The underlying system may need inspection for issues involving:
- Caliper movement
- Hardware
- Pad movement
- Hydraulic operation
- Other mechanical components
Uneven wear can also occur between different wheels.
Why does this matter?
If the cause isn’t corrected, a new set of pads may develop a similar problem.
Expert Tip: When brake wear looks uneven, ask what caused the uneven wear—not only how much the new parts will cost.
7. Inspect the Brake Rotors
Brake rotors, also called brake discs, provide the friction surface for disc brake pads.
During inspection, look for obvious signs of abnormal condition.
These can include:
- Deep grooves
- Severe scoring
- Cracks
- Heavy corrosion
- Uneven surface condition
- Heat-related discoloration
- Other visible damage
A rotor that looks slightly discolored isn’t automatically defective.
Likewise, a smooth-looking rotor isn’t automatically within specification.
Rotor thickness and condition should be checked against the vehicle manufacturer’s service requirements.
NHTSA guidance has specifically highlighted the importance of using applicable rotor or disc specifications rather than making replacement decisions based on appearance alone.
8. Check Brake Calipers
Brake calipers apply pressure to brake pads in disc-brake systems.
A driver may not be able to perform a complete caliper inspection without specialist equipment and access, but several symptoms can justify further investigation.
Pay attention to:
- Uneven pad wear
- Brake drag
- Pulling
- Repeated brake noise
- Excessive heat from one wheel
- Visible fluid leakage
A caliper-related problem can sometimes create multiple symptoms at once.
For example, one wheel may show faster pad wear while the vehicle also pulls during braking.
That’s why symptoms should be considered together rather than separately.
9. Inspect Brake Hoses and Lines
Brake hoses and hydraulic lines help carry braking pressure through the system.
A visible inspection should look for obvious damage.
Check for signs such as:
- Cracks
- Swelling
- Abrasion
- Corrosion
- Physical damage
- Wetness
- Poor routing
- Damaged connections
NHTSA-published maintenance material includes inspection of brake hoses and the exterior of brake components for damage, while also emphasizing that inspection frequency depends on the vehicle and its use.
Don’t crawl underneath a vehicle unless it is properly supported using appropriate equipment.
A brake inspection isn’t worth creating another safety hazard.
10. Check the Parking Brake
The parking brake is also part of the vehicle’s braking system.
Depending on the vehicle, it may be:
- A traditional handbrake
- A foot-operated parking brake
- An electronic parking brake
Check whether it:
- Engages correctly
- Releases correctly
- Holds the vehicle as intended
- Produces warning messages
- Makes unusual noises
- Shows abnormal behavior
Electronic parking brakes can also have system-specific warning messages, so consult the owner’s manual when a warning appears.
Brake Noise Inspection Checklist
Brake noise is one of the most common reasons drivers become concerned.
But not every noise means the same thing.
Listen for:
- Squeaking
- Squealing
- Grinding
- Scraping
- Clicking
- Repeated metallic sounds
- Clunking
The most useful information is often when the sound happens.
For example:
“It squeaks only during the first few stops in the morning.”
is more useful to a technician than:
“My brakes make noise.”
Record whether the noise happens:
- During light braking
- During hard braking
- At low speed
- At highway speed
- When reversing
- After rain
- When the brakes are hot
- Continuously or occasionally
Grinding or severe scraping should receive prompt attention because it can indicate significant component wear or another mechanical problem.
What Does Brake Vibration Mean?

Brake vibration can be felt through:
- Brake pedal
- Steering wheel
- Seat
- Vehicle body
Don’t immediately assume that every vibration is caused by a brake rotor.
Possible causes can involve:
- Brake components
- Tires
- Wheels
- Suspension
- Wheel balance
- Other mechanical conditions
The timing of the vibration matters.
Ask yourself:
- Does it happen only while braking?
- Does it occur at a particular speed?
- Is the steering wheel vibrating?
- Does the brake pedal pulse?
- Is the vibration getting worse?
- Does it happen after repeated braking?
This information can help a technician narrow down the problem.
For related tire checks, see the Tire Maintenance Guide in Dubai, particularly if vibration occurs alongside uneven tire wear or other tire symptoms.
Why Does a Car Pull When Braking?
A car that pulls to one side while braking deserves attention.
Possible causes can include:
- Uneven braking force
- Brake-pad wear
- Caliper problems
- Tire-pressure differences
- Tire condition
- Wheel alignment
- Suspension problems
This is a good example of why brake inspection should not happen in isolation.
A braking complaint can sometimes involve the tires or suspension.
If you’re also noticing changes in ride quality, steering, or handling, the Suspension Maintenance Guide in Dubai provides additional information about related inspection areas.
Brake Inspection and Tire Pressure
Tires and brakes work together to control how a vehicle slows and maintains road contact.
Incorrect tire pressure doesn’t necessarily mean there is a brake problem, but it can affect handling and braking behavior.
During a general vehicle inspection, check:
- Recommended tire pressure
- Actual tire pressure
- Uneven tread wear
- Sidewall damage
- Abnormal wear patterns
- Tire age and condition according to manufacturer guidance
For a dedicated guide, see Tire Pressure Maintenance in Dubai.
Quick Tip: Check tire pressure according to the vehicle manufacturer’s recommended values rather than using a generic pressure number from another vehicle.
Brake Inspection in Dubai: What Drivers Should Consider
Dubai driving can involve conditions that make consistent vehicle inspection particularly useful.
Common driving situations include:
- Heavy urban traffic
- Frequent stop-and-go driving
- Repeated braking
- Highway travel
- Long-distance journeys
- High temperatures
- Extended air-conditioning use
- Busy intersections
- Frequent acceleration and deceleration
These conditions don’t automatically mean your brakes need premature replacement.
That’s an important distinction.
Heat and traffic are reasons to monitor the vehicle, not reasons to automatically replace parts.
A better maintenance approach is:
Inspect → Measure → Diagnose → Maintain → Monitor
rather than:
Assume the climate caused wear → Replace everything
This keeps brake maintenance practical and evidence-based.
Brake Inspection Checklist for Stop-and-Go Traffic
If most of your driving happens in busy urban traffic, pay attention to:
- Frequent brake applications
- Brake-pedal feel
- Brake noise
- Vehicle pulling
- Brake vibration
- Pad wear
- Tire condition
- Warning lights
Repeated braking can contribute to brake wear over time.
That doesn’t mean every driver needs to replace pads at the same mileage.
Actual wear depends on the vehicle, components, traffic, driving habits, and other conditions.
Brake Inspection Before a Long Highway Trip
A long journey is a poor time to discover that the brake pedal feels abnormal.
Before a major trip, check:
Dashboard
- Brake warning light
- ABS warning light
- Parking-brake warning
Pedal
- Normal firmness
- Normal travel
- No sudden softness
- No unusual sinking
Fluid
- Correct level
- No obvious leakage
- Correct specification
Brakes
- No new grinding
- No severe scraping
- No unusual vibration
- No major pulling
Tires
- Correct pressure
- No obvious damage
- No severe uneven wear
Parking brake
- Applies correctly
- Releases correctly
- No warning remains active
If something has recently changed, have it inspected before starting the journey.
For a wider pre-trip maintenance routine, the Vehicle Maintenance Guides can be useful alongside this brake checklist.
How Often Should You Inspect Your Brakes?
There isn’t one universal brake inspection interval that applies to every vehicle.
The appropriate schedule depends on:
- Vehicle manufacturer recommendations
- Mileage
- Driving conditions
- Brake-system design
- Driving habits
- Traffic
- Vehicle load
- Previous repairs
- Brake symptoms
- Component condition
NHTSA-published maintenance material notes that inspection intervals can depend on vehicle use and recommends following the vehicle manual’s recommendations.
A practical approach
Check the vehicle’s maintenance schedule first.
Then inspect sooner if you notice a new symptom.
For example, don’t wait for the next scheduled service if:
- The pedal suddenly feels different
- A warning light appears
- Grinding starts
- The car pulls while braking
- Brake fluid is leaking
- Braking performance changes
Brake Inspection vs Brake Maintenance
These two terms are often used interchangeably, but they have different purposes.
| Brake Inspection | Brake Maintenance |
|---|---|
| Checks condition | Addresses maintenance needs |
| Looks for symptoms | Corrects confirmed problems |
| Identifies wear | May involve replacement |
| Can include visual checks | May require mechanical service |
| Helps determine next action | Keeps components within service requirements |
Inspection should generally come before replacement decisions.
For example, a technician might inspect your brake pads and determine that they still have sufficient usable material.
There may be no reason to replace them immediately.
On the other hand, if a component is below its specified service limit or has damage, maintenance may be necessary.
For more detailed information about ongoing brake care, see Brake Maintenance Basics in Dubai.
Brake Inspection for Cars With ABS
Modern vehicles commonly use anti-lock braking systems.
ABS is designed to help maintain steering control during certain hard-braking situations by controlling wheel lock.
If the ABS warning light remains illuminated, the system should be diagnosed.
Don’t assume:
“The normal brakes work, so ABS doesn’t matter.”
The vehicle may still have basic braking capability while an electronic safety system has a fault.
The exact warning behavior and system operation vary by vehicle, so the owner’s manual is an important reference.
What Should a Professional Brake Inspection Include?

A professional brake inspection can go much further than what a driver can see from outside the vehicle.
Depending on the vehicle and symptoms, the technician may inspect:
- Brake pads
- Brake shoes where applicable
- Rotors
- Drums
- Calipers
- Wheel cylinders
- Brake hoses
- Hydraulic lines
- Master cylinder
- Brake fluid
- Parking brake
- ABS system
- Electronic wear indicators
- Warning-system data
- Tire condition
- Brake operation
NHTSA materials show that formal brake inspection procedures can include component integrity, friction material, hydraulic leakage, hoses, and other brake-system components.
Some inspections require wheel removal or specialized measurements.
That’s why a driver-level checklist should be viewed as an early-warning tool—not a replacement for professional brake service.
Brake Pad and Rotor Inspection: What Professionals Look For
A professional inspection doesn’t only ask whether the brake pad “looks thin.”
It may consider:
- Remaining friction material
- Inner versus outer pad wear
- Left versus right wear
- Rotor surface condition
- Rotor thickness
- Manufacturer minimum thickness
- Cracks
- Scoring
- Caliper movement
- Hardware condition
- Brake-fluid contamination
- Other related components
NHTSA guidance specifically notes the importance of applicable rotor dimensions and manufacturer specifications when assessing serviceability.
Why measurements matter
Two rotors can look similar but have different remaining thickness.
Likewise, two brake pads can look similar from outside while wearing differently on the inner surface.
This is why professional inspection sometimes requires removing the wheel or using appropriate measuring equipment.
Common Brake Inspection Mistakes
1. Waiting for Grinding
Many drivers wait until brakes make a severe noise before checking them.
That’s not a good maintenance strategy.
Brake wear can develop without dramatic noise.
Better approach
Monitor pedal feel, noise, vibration, warning lights, and routine inspection results.
2. Replacing Parts Without Diagnosis
A common mistake is assuming:
“The brakes feel strange, so I need new pads.”
The actual problem could involve a rotor, caliper, tire, hydraulic system, suspension, or another component.
Better approach
Diagnose the cause before deciding what needs replacement.
3. Ignoring Uneven Wear
Uneven pad wear can be an important clue.
Replacing the pads without finding the reason may allow the same problem to return.
4. Adding Brake Fluid Without Investigating
Low brake fluid can have an underlying cause.
Don’t automatically treat it like topping up windshield washer fluid.
5. Using Generic Wear Limits
Brake components don’t all have identical specifications.
Use the vehicle manufacturer’s service information.
6. Inspecting Only the Front Brakes
Rear brakes matter too.
A complete inspection considers the entire braking system.
7. Ignoring Tires
A tire problem can affect vehicle behavior during braking.
That is why tire pressure and tire condition belong in a wider brake-related inspection.
8. Assuming Dubai Heat Means Automatic Brake Replacement
High temperatures can influence vehicle operating conditions, but climate alone isn’t a replacement specification.
Inspect the actual components.
Measure them when required.
Follow manufacturer limits.
Then decide what maintenance is necessary.
When Should You Get Your Brakes Professionally Inspected?
Professional inspection is appropriate when you notice a significant change in braking behavior.
Pay particular attention to:
- Persistent brake warning light
- ABS warning light
- Sudden soft brake pedal
- Pedal sinking
- Major increase in pedal travel
- Severe grinding
- Significant scraping
- Brake-fluid leakage
- Strong pulling
- Major vibration
- Reduced braking performance
- Unusual heat from one wheel
- Damaged brake components
- Parking-brake malfunction
If the vehicle’s braking ability appears seriously compromised, don’t continue driving simply to reach a workshop.
Arrange appropriate assistance.
A Simple Brake Inspection Routine for Drivers
You don’t need to perform a detailed mechanical inspection every morning.
Instead, develop a simple routine.
Before driving
Notice:
- Warning lights
- Brake pedal feel
- Parking-brake status
During normal driving
Pay attention to:
- New noises
- Vibration
- Pulling
- Pedal changes
- Braking response
During routine servicing
Ask for:
- Brake-pad inspection
- Rotor inspection
- Brake-fluid inspection
- Hydraulic-system inspection
- Tire check
Before long trips
Perform a broader vehicle inspection.
When something changes
Don’t ignore it simply because the vehicle still moves normally.
Printable Brake Inspection Checklist
Use this version as a quick reference.
Dashboard
- Brake warning light checked
- ABS warning light checked
- Parking-brake warning checked
- No unexpected brake-system message
Brake Pedal
- Pedal feels normal
- Pedal isn’t unusually soft
- Pedal isn’t sinking
- Pedal travel feels normal
- Brake response is consistent
Brake Fluid
- Level checked according to manufacturer’s procedure
- No obvious leakage
- Reservoir appears intact
- Correct brake-fluid specification confirmed
Brake Pads
- Pad condition inspected
- No obvious severe wear
- No major uneven wear
- No obvious contamination
- Wear indicator checked where fitted
Rotors/Discs
- No obvious cracks
- No severe scoring
- No significant damage
- Condition checked against service requirements
Hydraulic Components
- Hoses checked
- Lines checked
- No obvious leakage
- No obvious physical damage
Driving Symptoms
- No grinding
- No severe scraping
- No unusual persistent squealing
- No major vibration
- No unexpected pulling
- No obvious brake drag
Parking Brake
- Applies correctly
- Releases correctly
- Holds vehicle as intended
- No unexpected warning
Tires
- Tire pressure checked
- Tire condition checked
- No obvious sidewall damage
- No severe uneven wear
Brake Inspection Checklist for Used Cars
If you’re buying a used vehicle, brake inspection becomes even more important.
Don’t rely only on the seller saying:
“The brakes were recently changed.”
Ask for evidence where available.
Check:
- Brake pedal feel
- Warning lights
- Brake-fluid condition
- Pad condition
- Rotor condition
- Uneven wear
- Brake noise
- Vibration
- Pulling
- Parking brake
- Tire condition
- Service records
A professional pre-purchase inspection can provide information that a short test drive cannot.
Why?
Because some brake problems are easier to identify when the wheels are inspected and components are measured.
Brake Inspection After Brake Service

After brake work, the braking system should behave consistently with the vehicle’s normal operation.
Pay attention to:
- Pedal feel
- Warning lights
- Brake noise
- Vehicle tracking
- Brake response
- Any unusual vibration
A new sound immediately after service doesn’t necessarily prove that the work was done incorrectly, but it should be reported if it is persistent, severe, or accompanied by another symptom.
Don’t ignore a significant change simply because new components were installed.
Brake Inspection Checklist for High-Mileage Vehicles
Higher-mileage vehicles may have greater variation in component condition.
That doesn’t mean every high-mileage vehicle needs every brake component replaced.
Instead, pay attention to:
- Service history
- Brake-fluid service history where applicable
- Pad wear
- Rotor condition
- Caliper condition
- Hydraulic lines
- Brake hoses
- Parking brake
- ABS warnings
- Tire condition
- Suspension condition
The vehicle’s actual condition is more useful than mileage alone.
How Tires, Brakes and Suspension Work Together
A car doesn’t brake using the brake system alone.
The braking system generates braking force, but the tires transfer that force to the road.
The suspension helps keep the vehicle’s wheels controlled and in contact with the road surface.
That’s why symptoms can overlap.
For example:
Brake vibration → could involve brakes, wheels, tires, or suspension.
Pulling → could involve braking, tires, alignment, or suspension.
Uneven tire wear → may indicate tire-pressure, alignment, suspension, or other issues.
This broader approach is why a complete vehicle maintenance routine is more useful than looking at one component in isolation.
Expert Advice for Better Brake Inspection
A practical brake inspection doesn’t need to be complicated.
It needs to be consistent.
1. Know how your normal brake pedal feels
You can’t identify a change if you don’t know what’s normal.
2. Don’t ignore small changes
A new noise or vibration is useful information.
3. Record when symptoms happen
Note the speed, temperature, road condition, and braking situation.
4. Ask what caused the wear
Don’t only ask what part needs replacing.
5. Use manufacturer specifications
Brake measurements vary by vehicle.
6. Inspect related systems
Include tires and suspension when symptoms suggest they may be involved.
7. Don’t let climate become the diagnosis
Dubai heat and traffic are operating conditions—not automatic proof that a component has failed.
8. Use professional inspection for measurements
Visual inspection has limits.
What Is the Best Way to Use a Brake Inspection Checklist?
The checklist works best as a monitoring tool.
Think of it as a sequence:
Observe → Record → Inspect → Diagnose → Maintain → Monitor
For example:
You notice vibration during braking.
You record when it happens.
A technician inspects the brake system and related tire/wheel components.
The actual cause is identified.
Only the necessary maintenance is performed.
You then monitor the vehicle afterward.
This approach is more useful than replacing parts based on assumptions.
How often should I inspect my car brakes?
Brake inspection frequency depends on your vehicle, driving habits, mileage, traffic conditions, and the manufacturer’s recommended maintenance schedule. There isn’t one mileage figure that works for every car. A vehicle driven mostly in heavy stop-and-go traffic may experience different brake wear from one used mainly for longer highway journeys.
A practical approach is to have the brakes checked during routine vehicle servicing and pay attention to any changes between scheduled inspections. If you notice unusual noise, vibration, pulling, a softer brake pedal, a warning light, or reduced braking performance, don’t wait for the next scheduled service. The system should be assessed sooner.
Important points:
Follow the vehicle manufacturer’s brake inspection schedule.
Check the brakes sooner when new symptoms appear.
Stop-and-go driving can increase brake usage.
Brake-pad wear isn’t determined by mileage alone.
A professional inspection can identify wear that isn’t obvious from outside.
What are the warning signs that my brakes need immediate inspection?
Some brake symptoms should be treated as early warnings rather than normal vehicle behavior. A sudden change in brake-pedal feel, persistent brake warning light, grinding noise, significant vibration, strong pulling, or visible brake-fluid leakage can indicate a problem that requires prompt attention.
Grinding is particularly concerning because it can indicate severe friction-material wear or contact between brake components. Similarly, a brake pedal that suddenly becomes soft or sinks farther than normal shouldn’t be ignored. The exact cause can vary, so replacing a component based only on the symptom isn’t always the correct solution.
Watch for these signs:
Brake or ABS warning light remains illuminated.
Brake pedal suddenly feels soft or spongy.
Pedal travels noticeably farther than usual.
Vehicle pulls strongly while braking.
Grinding or severe scraping develops.
Steering wheel or brake pedal vibrates significantly.
Brake fluid appears to be leaking.
Braking performance noticeably decreases.
One wheel becomes unusually hot after normal driving.
If braking performance appears seriously compromised, avoid continuing to drive the vehicle unnecessarily and arrange appropriate professional assistance.
How can I check my brake pads and rotors during a brake inspection?
A basic visual inspection can sometimes give you useful information, but it doesn’t always provide a complete picture. Depending on the vehicle design, part of the brake pad may be visible through the wheel or caliper opening. You can look for obvious signs of excessive wear, damage, contamination, or significant unevenness.
Rotors should also be checked for obvious severe scoring, cracks, unusual damage, or abnormal surface condition. However, appearance alone doesn’t establish whether a rotor or pad is within its service limit. Brake components have vehicle-specific specifications, and professional inspection may require wheel removal and accurate measurements.
During inspection, look for:
Remaining brake-pad friction material.
Uneven wear between pads.
Deep rotor scoring.
Cracks or obvious rotor damage.
Severe corrosion or abnormal surface condition.
Signs of fluid contamination.
Excessive wear on one side compared with another.
Professional advice: Don’t use a generic “minimum pad thickness” number found online for every vehicle. The correct service limit depends on the vehicle and component specifications.
If the pads appear unevenly worn, don’t simply replace them without asking why. Caliper movement, hardware, hydraulic operation, or other issues may be contributing to the uneven wear.
What does it mean if my car pulls, shakes, or vibrates when braking?
Pulling or vibration during braking is a symptom rather than a diagnosis. The cause can involve the brakes, but it can also involve tires, wheels, alignment, or suspension components. This is why replacing brake pads or rotors immediately isn’t always the correct response.
If the vehicle pulls strongly to one side, the braking force may not be acting evenly, but tire pressure, tire condition, alignment, or suspension issues can also influence vehicle behavior. A vibration through the steering wheel or brake pedal may likewise have several possible causes.
Pay attention to the exact symptom:
Pulling to one side: Check brake operation, tire pressure, tires, alignment, and suspension.
Steering-wheel vibration: Consider brake, wheel, tire, or suspension-related causes.
Brake-pedal pulsation: Requires assessment of the braking system and related components.
Vibration only at certain speeds: Record the speed and conditions when it occurs.
Vibration after repeated braking: Tell the technician when the symptom appears.
A useful habit is to describe the symptom precisely. Instead of saying, “My brakes are shaking,” explain whether the steering wheel, brake pedal, or entire vehicle vibrates and under what conditions. This gives the technician much better information for diagnosis.
Should I replace my brake pads and rotors together?
Brake pads and rotors don’t automatically need to be replaced at the same time. The correct decision depends on the actual condition of each component and the manufacturer’s service specifications. A proper brake inspection should determine whether the pads have sufficient usable material and whether the rotors remain within their applicable condition and dimensional limits.
For example, brake pads may require replacement while the rotors remain serviceable. In another situation, both components may have reached their respective service limits or the rotors may have damage that makes replacement appropriate.
Replacing both automatically isn’t necessarily better maintenance. At the same time, installing new pads on a rotor that is damaged or outside its service requirements may not address the underlying problem.
Before replacing brake components, check:
Brake-pad thickness and condition.
Uneven pad wear.
Rotor thickness.
Rotor surface condition.
Cracks or severe scoring.
Caliper operation.
Manufacturer’s minimum specifications.
Overall braking-system condition.
Best practice: Inspect first, measure where required, identify the actual problem, and then replace the components that genuinely need replacement.
This approach helps avoid both unnecessary spending and incomplete brake repairs.
Conclusion
A brake inspection checklist gives you a practical way to monitor one of the most important safety systems in your vehicle. Regularly checking brake fluid, brake pads, rotors, calipers, brake lines, pedal feel, warning lights, and unusual braking symptoms can help identify problems before they become more serious.
For drivers in Dubai, frequent traffic, stop-and-go driving, high temperatures, highway journeys, and repeated braking can make consistent brake monitoring especially useful. However, brake wear should always be assessed according to the vehicle’s actual condition rather than assumptions about driving conditions alone.
The most effective approach is simple: inspect, measure, diagnose, maintain, and monitor. If you notice grinding, unusual vibration, pulling, a soft brake pedal, fluid leakage, warning lights, or noticeably reduced braking performance, arrange a professional inspection rather than continuing to drive and hoping the symptom disappears.
For broader vehicle care, use this brake checklist alongside a proper Vehicle Maintenance Guide and keep your tires, suspension, fluids, and other essential systems in good working condition. Consistent inspection is not about replacing parts unnecessarily—it is about understanding your vehicle’s condition and addressing genuine problems at the right time.
Leave a Reply